
Prepress is the quality determining step in print production. That’s when we prepare the documents to be printed correctly. To assist you in proper file preparation, we offer the following “practical guide” to prepress:
1) File type
We strongly recommend that you send us high-resolution PDF files whenever possible, as our quotes are based on this output. Within InDesign, choose “File / Export” with the type “Adobe PDF (Print). The “General” tab should specify [High Quality Print] for an Adobe PDF Preset, or specify” PDF/X-1a, PDF/X-3, or PDF/X-4. In the “Marks And Bleeds” tab, check “Crop Marks” under “Marks”, with a weight of 0.25 pt and an offset of 2 mm. Do not check “Use Document Bleed Settings” and add a bleed of 3 mm on all 4 margins.
PDF files should not be secured with a password.
Any file corrections on our part will be subject to additional charges.
We accept Adobe CS6 native files, in this case, be sure that elements are available: the native file, images and fonts.
We accept original Office files (Word, Excel, PowerPoint, Publisher …), but be aware that the use of these may lead to layout differences versus the original drivers used.
For files provided in AI or EPS format, please use outlined fonts.
We are of course available for any technical advice you may need in creating your files.
2) Image Resolution
All images should ideally have a resolution of 300 dpi at print size, with a 150 dpi minimum. Anything of lower resolution will exhibit pixilation, thus affecting the quality.
Line art (bitmap) should be at least 600 dpi at 100% to avoid “staircasing”.
For large format prints, consult the table below for the proper resolutions:
| Final format | Minimum resolution at 100% | Minimum resolution for a file from an A5 | Minimum resolution for a file from an A4 | Minimum resolution for a file from an A3 |
| A2 | 150 dpi | 425 dpi | 300 dpi | 212 dpi |
| A1 | 150 dpi | 600 dpi | 425 dpi | 300 dpi |
| A0 | 150 dpi | 850 dpi | 600 dpi | 425 dpi |
3) Colorimetry
It is better to CMYK color space images, with a profile “Fogra 39 / ISO coated V2”. With different color profiles or images provided in RGB, a color shift may occur at the time of separation by the RIP.
An exception to this is on large format files, where RGB images are welcome, as printing on 12 color inkjets, as opposed to process color (CMYK), expands the color spectrum, rendering “photographic” quality.
4) Color Management
With our digital printing systems, Pantone colors are systematically separated into process colors (CMYK), or are interpreted in 12 colors in the case of large format prints.
Make sure that solid blacks are specified, (C50 / M50 / Y30 / K100 for example).
Always check the trapping parameters, transparency and overprinting.
The management of trapping (color overlap) is automatically managed by our RIP.
5) Format and page setup
For booklets, the pages should not be submitted as spreads or imposed, but always as individual pages. We have imposition software that takes into account the gutter when necessary (staple bound brochure).
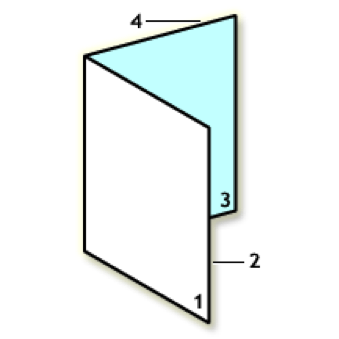
In all cases, the pages must be provided with bleeds and crop marks (see diagram below). As for flyers or covers, it is advisable to produce a spread. Do not forget to use proper offsets for folding. For example: a flyer with 3 panels with an open size of 298 x 210 mm, and 100 x 210 mm closed, will contain two panels at 100 mm width and the last panel at 98 mm, to avoid buckling when it’s folded.
The format is always indicated as width x height, for example:
A4 landscape (à l’italienne) should be written as 297 x 210 mm
A4 portrait (à la française) should be written as 210 x 297 mm
For a flyer or brochure, always specify the open and closed dimensions.
The reading direction is also important, for example in the case of a landscape format brochure with the binding on top, the pages are arranged top to bottom for proper front to back printing.
For Wire-O binding (spiral bound), remember to offset important pages elements 10mm from the edge, to allow for perforation.
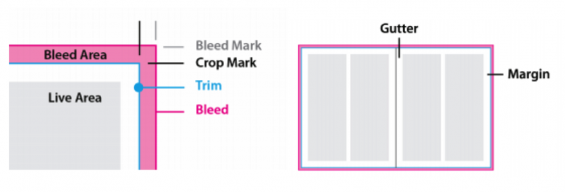
Live area=safe zone for important text or images.
Trim=where the page will be cut
Bleed=excess image area that must pass the trim dimensions (3mm) to avoid having the image border (page white) visible after cutting
Sheets vs. Pages Illustration
 One Sheet, Two Pages One Sheet, Two PagesA single sheet of paper has two sides. Each side is considered one page. So a sheet of paper is two pages. |
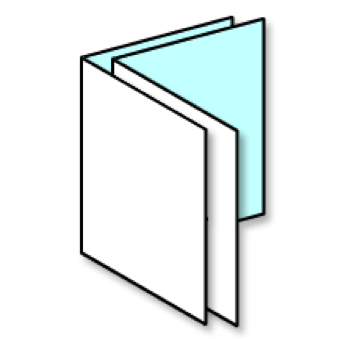
 One Sheet Folded, Four Pages One Sheet Folded, Four PagesA sheet folded in two is a four page document. Page one is the front cover, page two is the inside front, page three is the facing page, and page four is the back cover. |
 Two Folded Sheets, Eight Pages Two Folded Sheets, Eight PagesTwo folded sheets that are nested together are an eight page document. |